Creating an Amazon DynamoDB Table
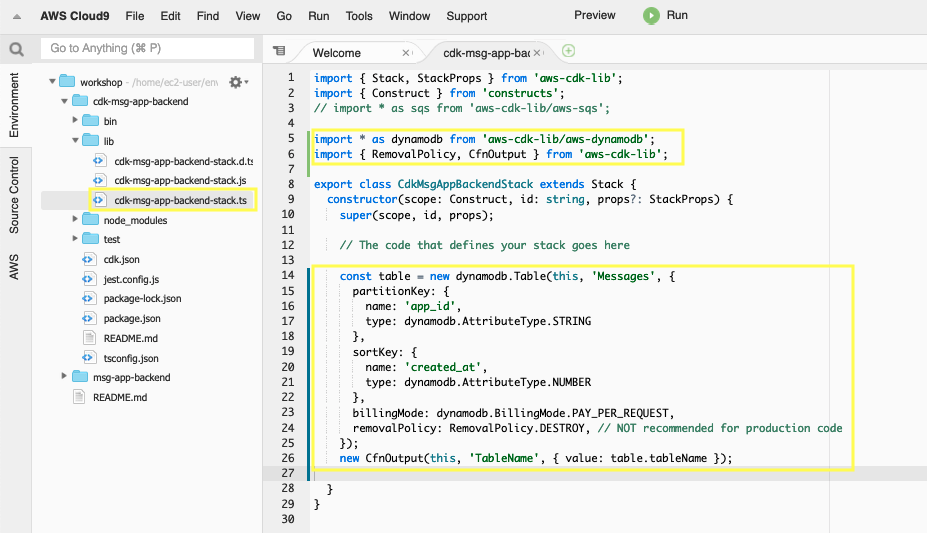
3.1. In lib/cdk-msg-app-backend-stack.ts, add the following below the last import.
import * as dynamodb from 'aws-cdk-lib/aws-dynamodb';
import { RemovalPolicy, CfnOutput } from 'aws-cdk-lib';
3.2. In lib/cdk-msg-app-backend-stack.ts, replace the comment “The code that defines your stack goes here” at the end of the constructor with the following code.
    const table = new dynamodb.Table(this, 'Messages', {
      partitionKey: {
        name: 'app_id',
        type: dynamodb.AttributeType.STRING
      },
      sortKey: {
        name: 'created_at',
        type: dynamodb.AttributeType.NUMBER
      },
      billingMode: dynamodb.BillingMode.PAY_PER_REQUEST,
      removalPolicy: RemovalPolicy.DESTROY, // NOT recommended for production code
    });
    new CfnOutput(this, 'TableName', { value: table.tableName });
3.3. Save it and make sure it builds and creates a stack.
cdk synth
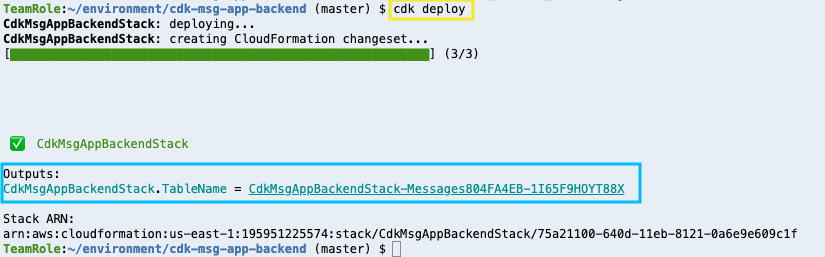
3.4. Deploy the stack.
cdk deploy
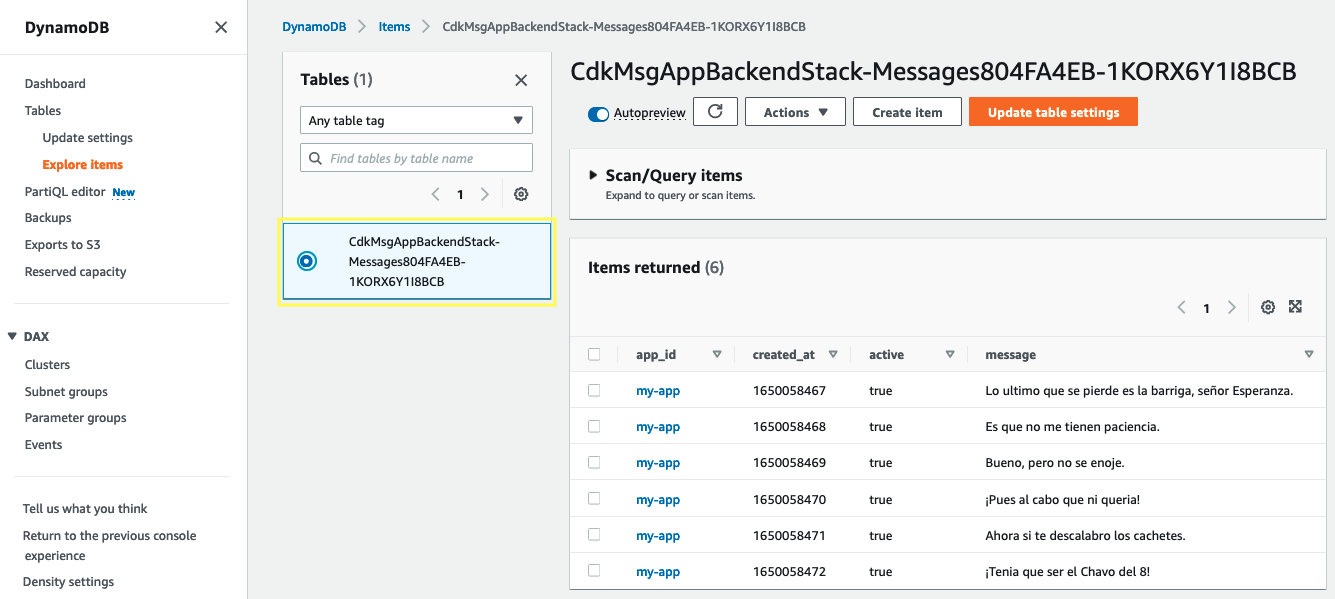
3.5. Open the Amazon DynamoDB console in Tables section https://console.aws.amazon.com/dynamodb/home?#tables:, you will see the messages table.
3.6 Go to your Node.js project folder.
cd ~/environment/msg-app-backend/
3.7. Obtain the DynamoDB Table name created and export it as an environment variable with the following command.
export MY_TABLE_NAME=`aws cloudformation describe-stacks --stack-name CdkMsgAppBackendStack | jq '.Stacks[0].Outputs[0].OutputValue' | tr -d \"`
echo $MY_TABLE_NAME
3.8. Feed the DynamoDB Table with some messages.
python db/batch_writing.py
3.9. Open the Amazon DynamoDB console in Tables section https://console.aws.amazon.com/dynamodbv2/home#item-explorer, select your table and explore the Items inserted.